
Google Authenticator (2FA) is a dynamic password tool similar to SMS verification. Once enabled, it automatically generates a new verification code every 30 seconds. These codes can be used for security verification during login, withdrawals, and modifications to security settings.
For the protection of your account and assets, Tapbit strongly recommends that all users enable Google Authenticator at the earliest opportunity.
Step 1: Log in to Tapbit → go to [Security Center]
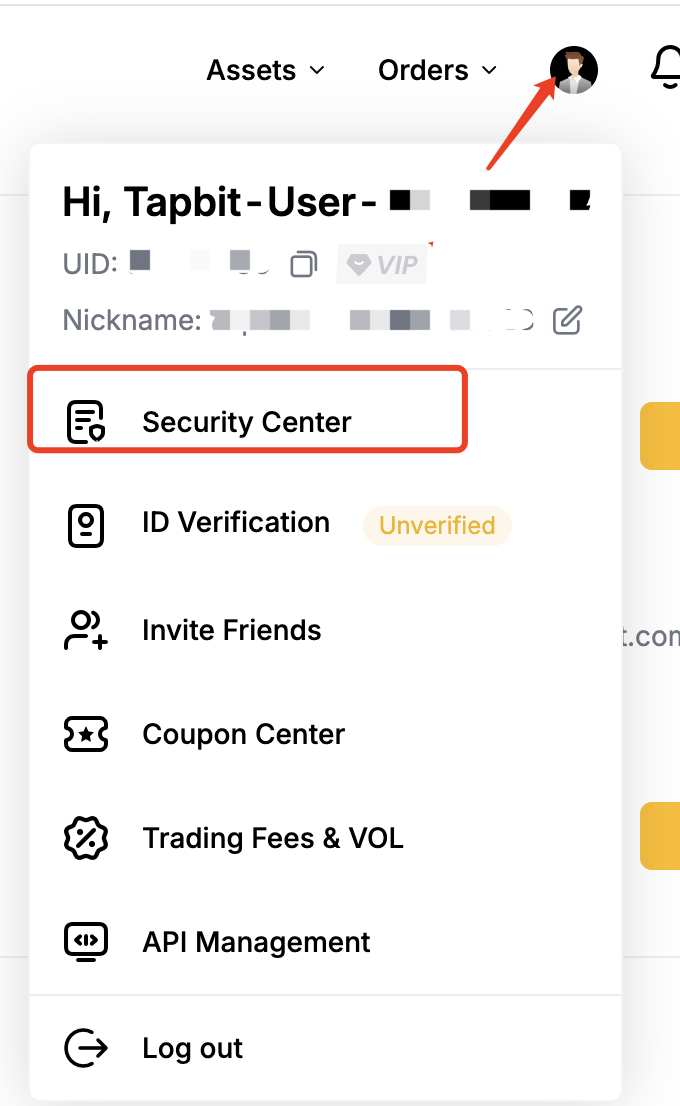
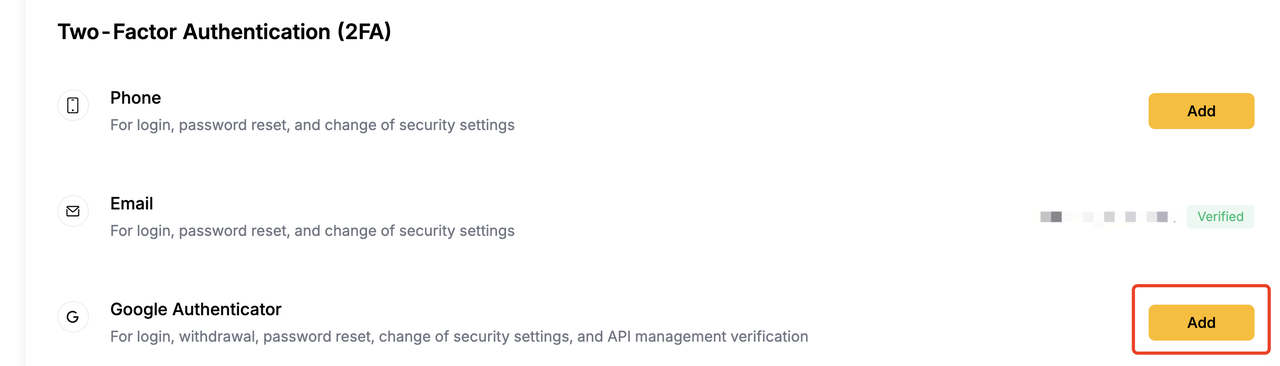
Under [Two-Factor Authentication (2FA)], select [Google Authenticator] → click [Add]
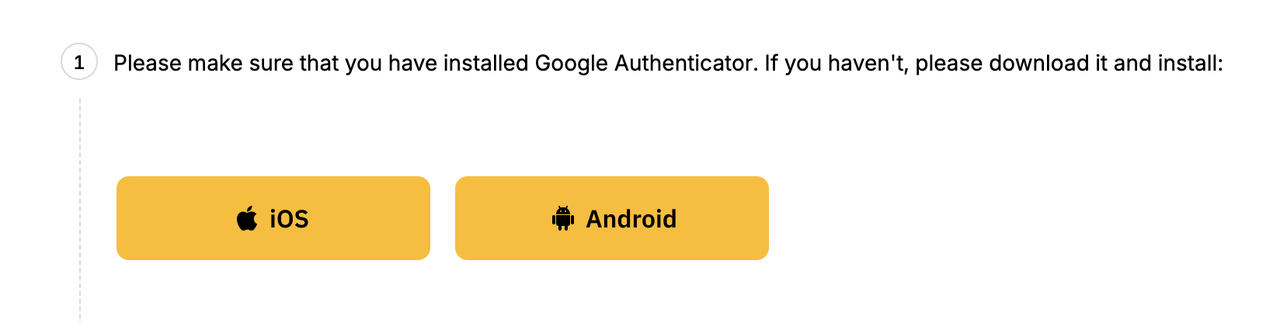
Step 2: Download and install Google Authenticator
-
iOS: Available on the App Store
-
Android: Available on Google Play

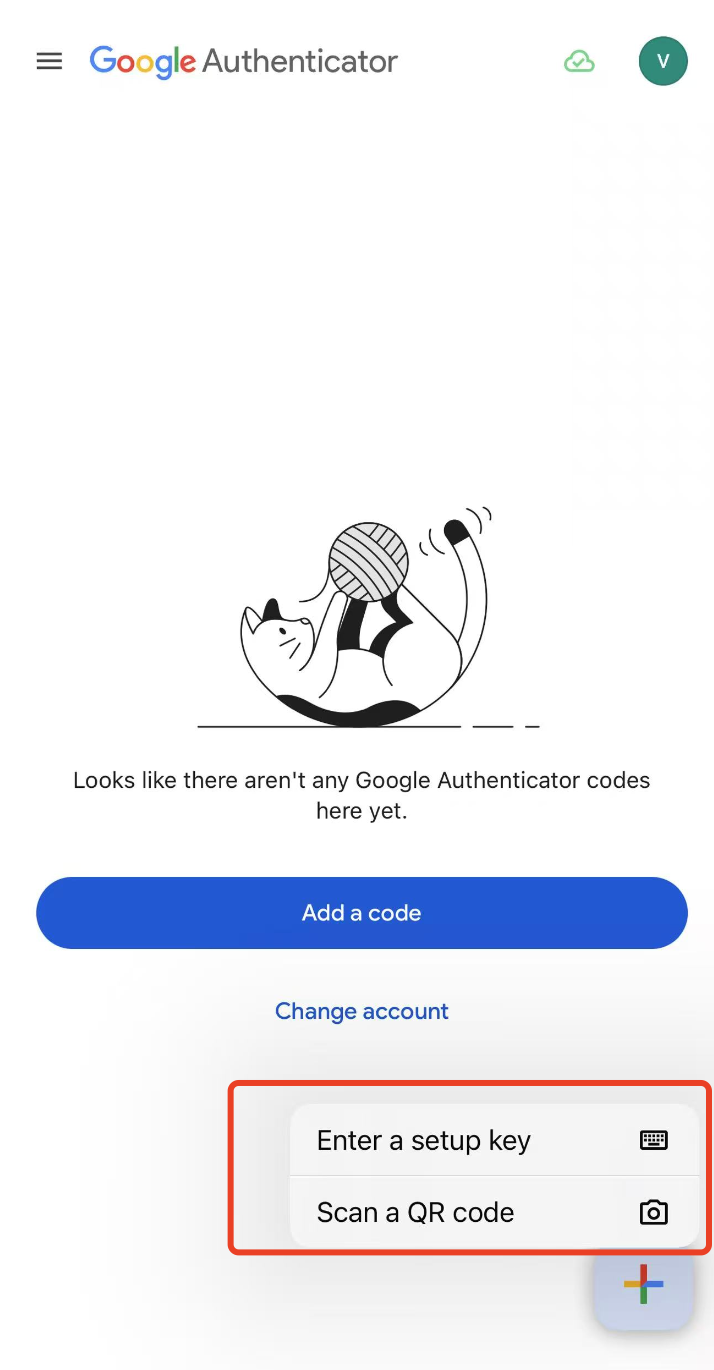
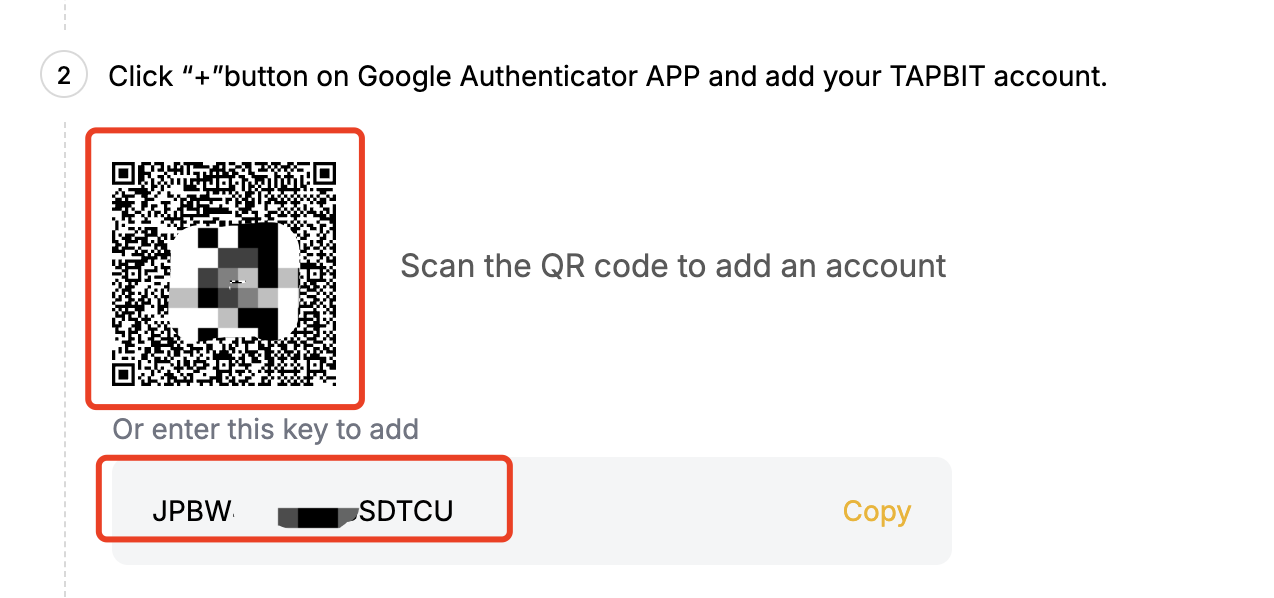
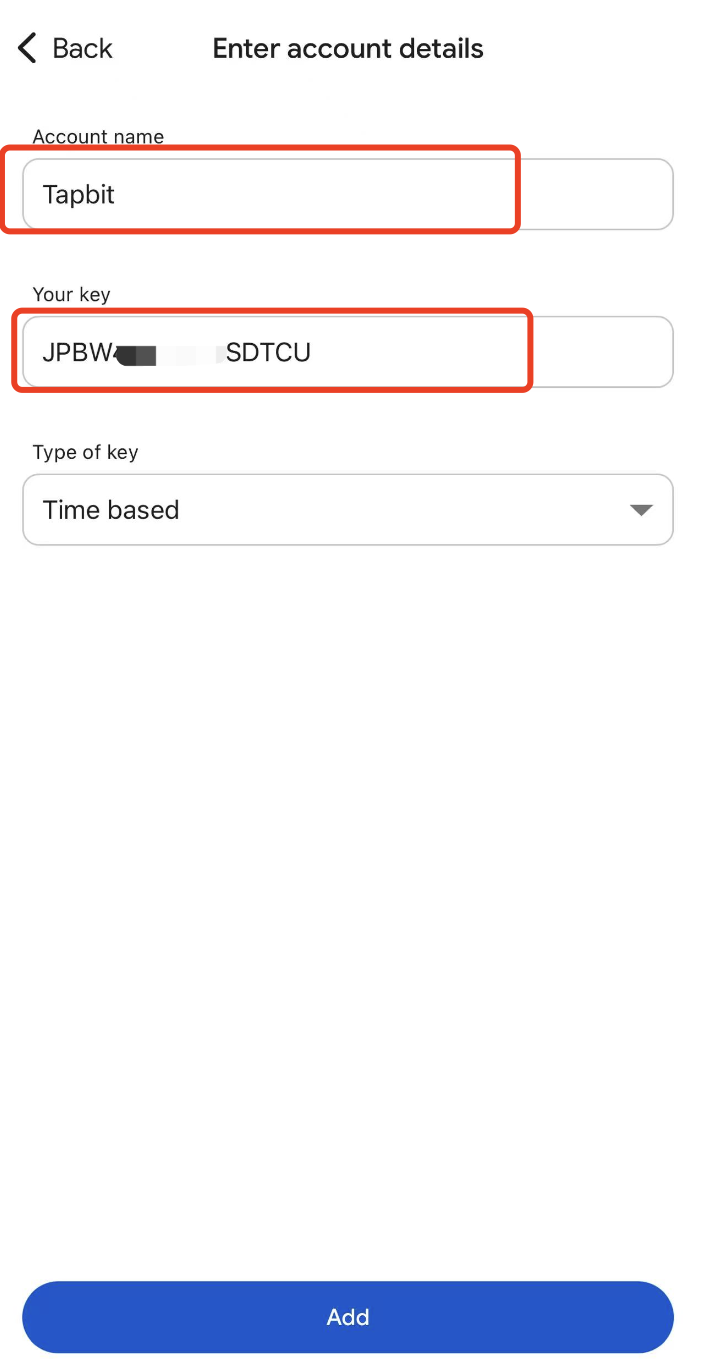
Step 3: Open Google Authenticator → tap the [+] button at the bottom right,→ tap [Scan a QR code] or [Enter a setup key]
-
Choose [Scan a QR code]: Scan the QR code shown on the binding page to add the account
-
Choose [Enter a setup key]: Copy the setup key from the binding page, enter your account name and key, then tap “Add”
Once added, Google Authenticator will generate a 6-digit dynamic code (refreshed every 30 seconds)

Step 4: Return to the Tapbit binding page and enter:
-
Your login password
-
Email/SMS verification code
-
Google Authenticator code
Click [Submit] to complete the binding.

Common reasons for Google Authenticator binding failure:
-
Phone time is not synchronized
-
Go to [Settings] → [Date & Time] on your phone
-
Ensure Automatic date & time / Automatic time zone is enabled
-
Make sure your phone time is synchronized with the network time
-
Incorrect key/QR code input
-
It is recommended to use QR code scanning whenever possible
-
Do not refresh the Tapbit binding page during the setup process, otherwise the QR code or key will be changed, which may cause the binding to fail
Tapbit Team